.jpg) |
This is the horse I made for my Granddaughter Emma (and eventually Joseph when he's big enough) as a Christmas present 2016. It is the medium fully-carved horse from The Rocking Horse Shop based in Fangfoss near York.
I carved this almost exclusively with mallet and gouge rather than with the arbortech (described in making the laminated horse) but, that apart, many of the tips and points on the laminated horse page also applied to making this one.
|
 |
Unlike the laminated horse that I did
6 years earlier, this one is built up in the traditional way
from blocks of tulip wood so there is no initial help in
deciding how much to carve away....
|
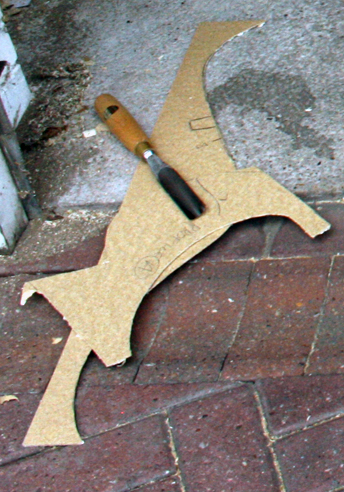 |
...however, the plans do include five
templates to help define the suggested principal contours
and I transferred these onto hardboard so I could offer
these up to the horse to see if I was on the right lines.
It is often said that the two chief mistakes when carving a horse are either carving away too little (so it looks too square) or carving away too much!
|
 |
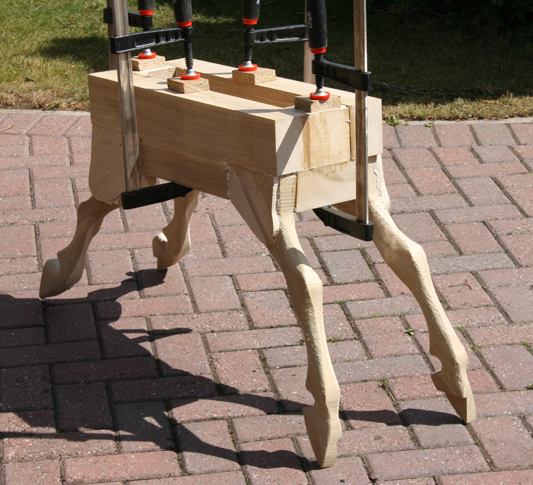
It is recommended that the head is
carved first before joining it to the body. This allows more
manoeuvring whilst carving what is, after all, the most
important part of the horse.
The head and neck blocks are then joined to the top of the body. The mistake I made at this stage was to try to glue too many pieces at once with too few clamps. When pressure from the clamps is exerting force in several directions at once there needs to be a lot of them to keep everything tight and secure. This resulted in some shifting of the right neck blocks which ended up a couple of centimetres further forward than I wanted. This meant I had a little less leeway when creating the smooth run down from the neck to the body. |
| If you use a modern polyurethane glue (where clamps can be removed after 30 minutes or so) there is really no excuse for trying to glue too many pieces at once. | |
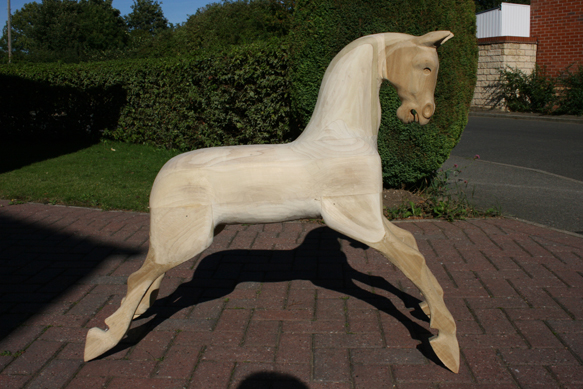 |
Still looking a little square and flat-bottomed at this stage, but after referencing dozens of pictures on the internet, I created a better chest shape, rear end, and run down from body to legs as can be seen in the next picture. |
 |
A little change can make a big
difference.
I also introduced some 'extra-carved' elements at this stage - neck and leg muscles, tendons etc. It really is worth trying to see as many images of rocking horses as possible to get an idea of what works and what doesn't. This applies equally when painting and finishing the horse. |
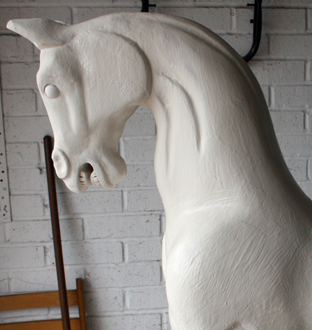 |
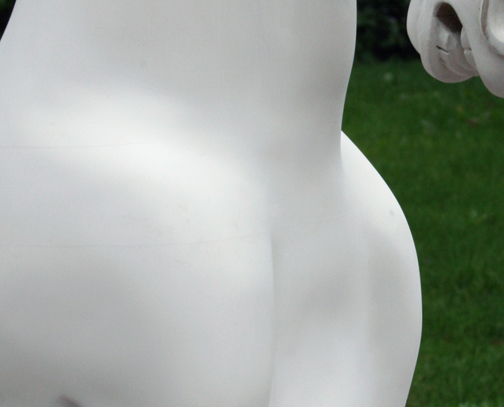
Gesso (rabbit skin glue and gilder's whiting) is an option before painting. I wasn't sure whether it would be worth all the trouble (soaking overnight, heating to near boiling, keeping reheating, leaving to dry for a week, plus the possibility of getting the mix wrong) but decided to use it anyway and I am glad I did. Although it was looking pretty untidy after 6 coats, it sands beautifully once dry and creates a finish as smooth as porcelain (see below). |
 |
|
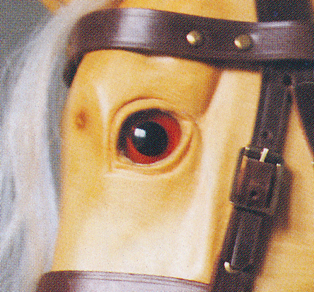
EYES |
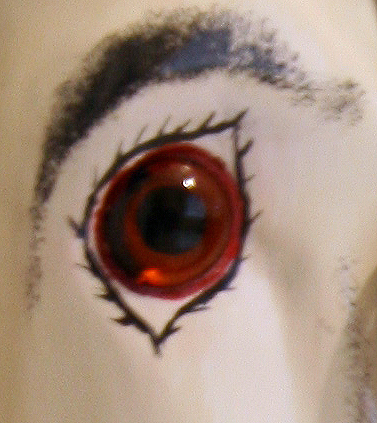 |
My choice was to add the glass eye in a shallow recess on a thin bed of wood filler. In this case, the eye is usually decorated as shown with painted eyelashes. |
 |
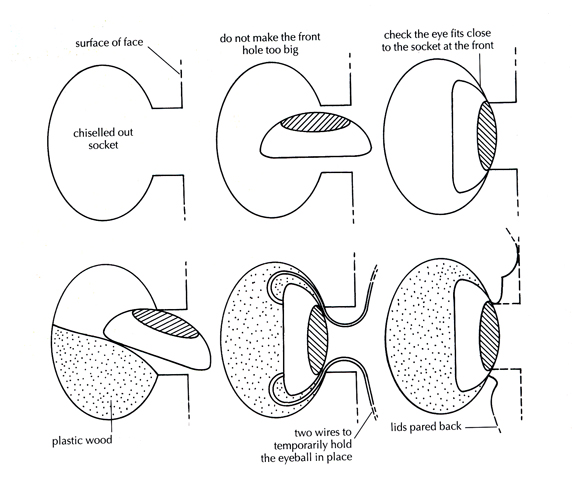
If I made another fully-carved horse I would really like to try the approach shown here where the eye is placed sideways into a deep socket, then pulled forward to sit against the carved lids. The illustration below (taken from 'Designing and Making Rocking Horses' by Margaret Spenser) shows how this is achieved. I am sure it is more difficult but gives a really nice result, particularly on a horse with a natural wood finish. |
|
|
| There are about 6 coats of undercoat - some grey, some white and the final two were off-white. The dappling and markings were done with black enamel paint with white enamel added. I would add even more white I think on a future project. The hooves are pure black enamel. The horse is finished with two coats of silk polyurethane varnish with a little yellow enamel added. Over time it should yellow further and mellow with age. | |
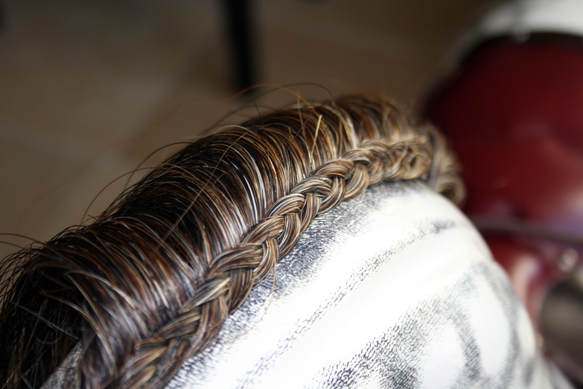 |
A couple of finishing touches.
A plait made from a few strands of the mane hair, sewn into the mane with matching thread. |
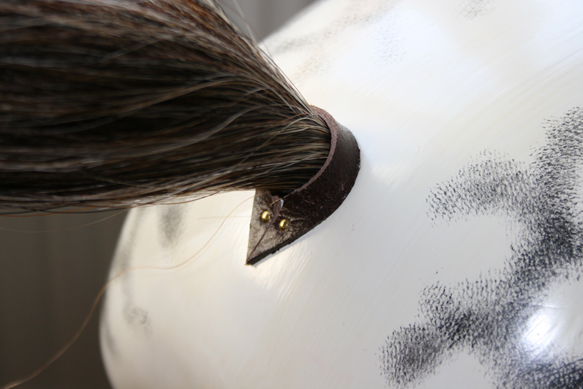 |
I decided not to include a crupper strap from the saddle block which is a feature on many rocking horses, but needed a way of creating a tidy finish around the tail hole. This seemed to be an effective method. |
 |
|
 |
Emma has now decided to call the horse 'Flower', which seems to me to be well chosen. However, apparently the horse also has an alter ago (a dragon, no less), and then the name is 'Flame'! |