|
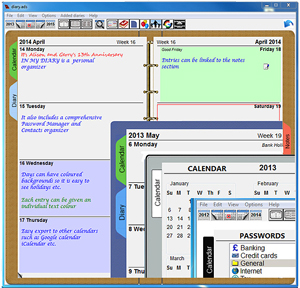
IN MY DIARY (Free Personal Organiser)
|
MAYDAY MUSIC Recordings archive |
|
FAMILY STUFF
|
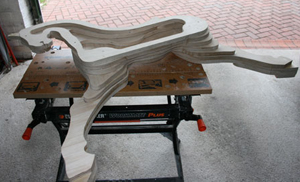
ROCKING HORSES ETC. |
|
RHYTHM CHASER Music rhythm reading software
|
Music for Bands, Percussion, Guitar, Voice etc. |
|
Legacy Software for RiscOS computers
|
The cutest little robot in all the world |